Grafting Tomatoes
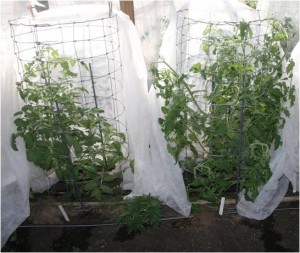
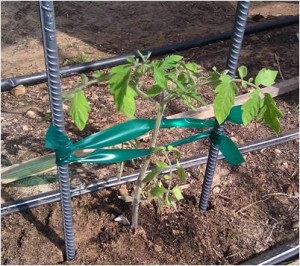
Grafting vegetables is one method for increasing production while overcoming many disease problems. Essentially, the desired vegetable is grafted onto a specific rootstock that has the desired disease resistance. In this article, I’m going to talk about my experience with grafting tomatoes for the first time. One lesson I learned is evident in the photo below: namely, grafted tomatoes may grow considerably larger than expected. The pole in the photo is in the middle of what had been a path between two rows of tomatoes. On the left are grafted Berkley Pink Tie Dye toma-toes and Gold Medal is on the right. By July it was not possible to walk in the row without stepping on tomatoes and branches.
I became interested in grafting tomatoes after reading an article about the success Italian gardeners have experienced with the practice. My interest is in growing heirlooms and some newer open pollinators (like Berkley Pink Tie Dye) and saving the seeds from outstanding plants. If you want to try grafted plants you can purchase small plants or grow your own from seed. After some research, I decided to jump in and try grafting from seed. So here’s what I learned.
Rootstock Selection
There are a few different rootstocks available. There are two categories of rootstock – generative (devotes more energy to flowers and fruit) and vegetative (devotes more energy to leaves and stems). Given our hot climate one other point to bear in mind is that more energy is needed so a vegetative rootstock might be useful. I tried three last year: Supernatural (which is widely used commercially), Maxifort (vegetative) and DRO 138 (balanced). Super-natural had germination problems and I was given my money back – I think this might have been an anomaly as I have not read that others had such problems. Maxifort and DRO 138 were fast germinators and strong growers and I did not see any significant difference between them. Both rootstocks were used successfully with a paste to-mato variety as well as with varieties that produces larger tomatoes (in excess of a pound in individual size).
The Grafting Process
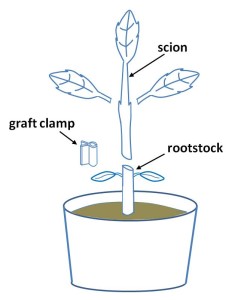
You need rootstock and seedlings from which you wish to create a graft. These plants need to be similar in size since they will be joined together using a joining device – I recommend a silicon clamp (I prefer spring loaded graft-ing clamps as they are easier to use and will fall off as the plant grows). In the process of grafting cleanliness is vital – soak clamps in alcohol or a bleach solution and clean your cutting blade throughout the process. I frequently use hand sanitizer during the process.
The grafting process itself is straightforward and quick but practice helps. Plants are ready to graft at 17 – 21 days after germination. Water them the day before grafting but not on grafting day. You will slice the top from the rootstock just before the cotyledons (first leaves) and discard the top. I prepare the scion (the desired tomato) by re-moving all but the leaf at the growing point – in giving the plant less leaves to support during the healing process (not everyone does it this way so feel free to experiment). Using a razor blade or other clean slicing device make a slicing cut in the scion that matches the angle of the cut to the rootstock. Join the two plants and attach the clamp.
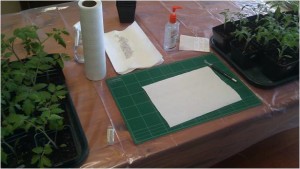
Now comes the step that makes or breaks this process: the healing chamber. It is important to understand that while the healing is taking place the moisture surrounding the plant is what is vital to the life of the scion. Plants need to be kept in a dark, moist environment for three days after which small amounts of light are gradually introduced. My first experience I killed most of the grafted plants because the healing area was not kept adequately moist. Much of the information I read about grafting didn’t account for our seriously dry conditions. I achieved success when I introduced a humidifier into the healing area. Please note that the rootstocks do not need to be watered during the time the plants are in the moist dark environment.
You will gradually introduce light and reduce humidity over the next week carefully watching the plants. If the plants appear wilted, return to the previous environment, you’re making changes a little too quickly for the plant.
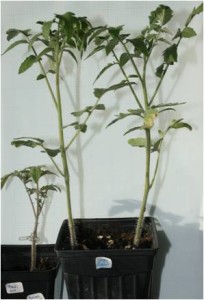
Grafted plants (on the left below) will, for a while, be smaller than their counterparts planted at the same time (on the right below).
Though in the garden in early June, San Marzano Lungo grafts (on the right below), have caught up and surpassed the heirlooms (on the left below) in size.
Once the grafted plants are growing and thriving treat them as any other tomato plant and harden them off before planting outside. When planting a graft it is important not to cover the graft with soil or the scion will root and you will not gain the benefit of grafting. Since you cannot “bury” the tomato plant deep as is recommended, you will need to provide support for your graft to help it survive the spring winds.
One other important issue is to period check your tomato plant for any stems that may be coming from the rootstock. These must be removed because they are taking energy from the plant. Any tomatoes produced by the rootstock offered commercial are not edible.
My grafted tomatoes produced extremely well. I had so many Berkley Pink Tie Dye tomatoes that I became tired of them. I put up more San Marzano Lungo tomatoes that I have ever put up in the past. My plants were still setting flowers into the first week in November and the plants still looked great.
Grafting tomatoes take time and effort. It was fascinating to experiment with grafting and I intend to graft tomatoes again this year. An added benefit is that with the increased production I can grow fewer plants and make more room for chiles in my protected garden where the squirrels will not be able to eat them down to the ground!
Happy gardening!


